Deleting inventory items

May 16, 2018
 769
769
Deleting Inventory Items
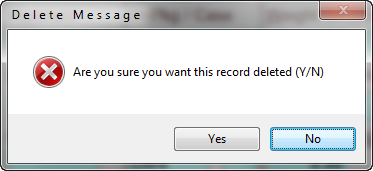
The [F5] option to delete an item brings up the prompt to verify that the user wants the selected item deleted, select yes to mark the item for deletion.
Remember if an item is deleted the Sales and Purchase History will still be accessible through the Sales Reporting and Purchase Reporting areas.
If the users are deleting or editing several inventory items (especially when first getting started) it is suggested that the Inventory file be Flushed and Reindexed to ensure data structure integrity. Refer to the Utilities, File Utilities section for more information on Flushing Bad Data and Reindexing files.
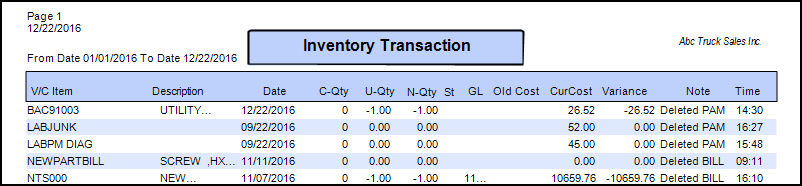
Use the Inventory Transactions Report to monitor Deleted items as shown below
Reporting on Deleted Part Numbers
Using the Inventory Transactions report to review Deleted items; refer to Inventory Transaction Report section for more suggestions on using this report.
This report will show any items edited with no supersessions created; go to ANY inventory item and select [F7] Print for the Label Menu, select R. Report Transactions, if prompted for printer select OK the following prompts will appear
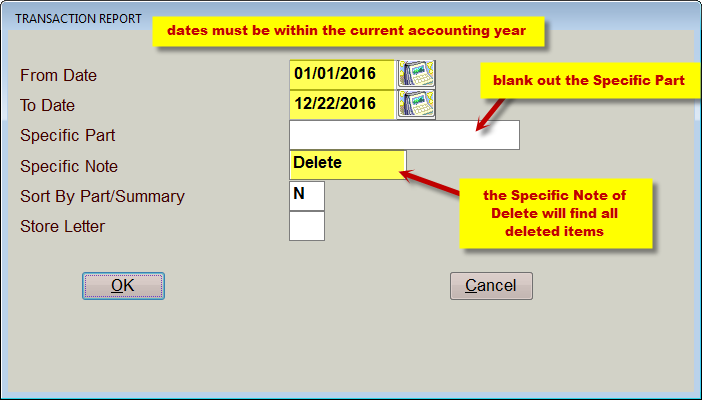
- The From Date and To date must be within the current year; when properly monitoring your Inventory run this report once a week or month for recent activity only.
- Delete the Specific Part to view ALL parts or enter a portion of the part to find specific entries.
- In the Specific Note enter the word Delete in proper case (upper case D with all others in lower case).
- Leave the Summary option N
- Select OK