2785
2785
Adjusting Column Views
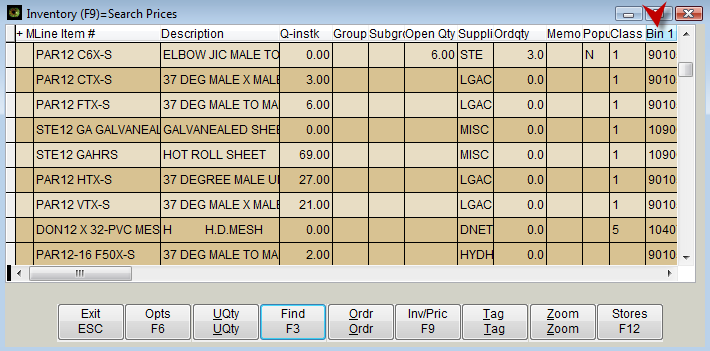
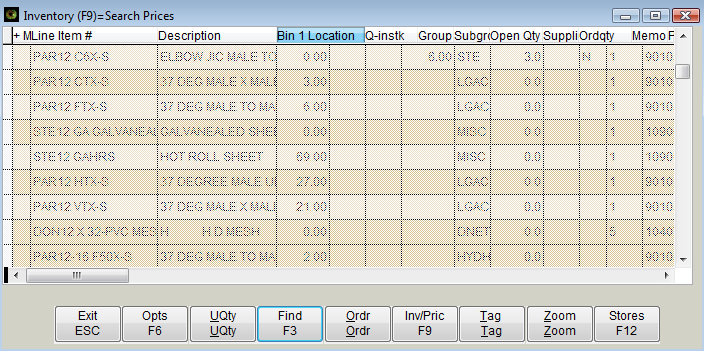
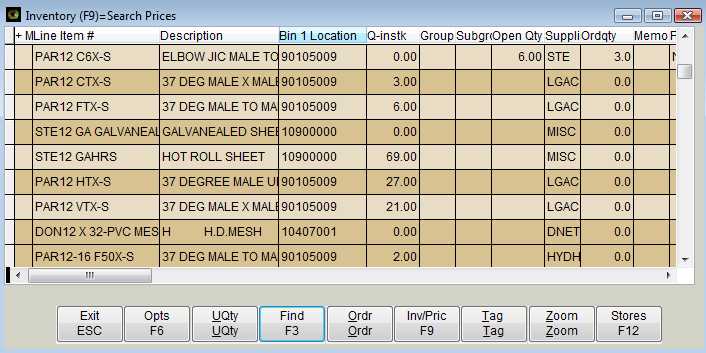
Columns can be moved and adjusted temporarily with Mouse, go to a column, select the column heading with the left click button on the mouse, move the column to the desired location by dragging it, release the column when it is located as needed. See the below example of the Bin 1 field moved from the far end of the view over next to the Description field.
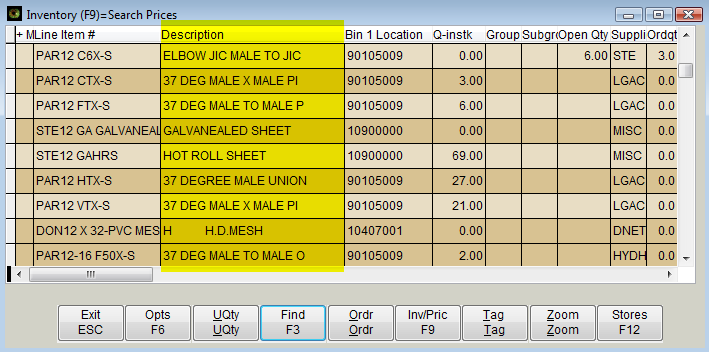
Column width can also be adjusted with the mouse; put the mouse any place on the dividing line of the column, left click and drag the column to resize it. See the next example of a wide description column.
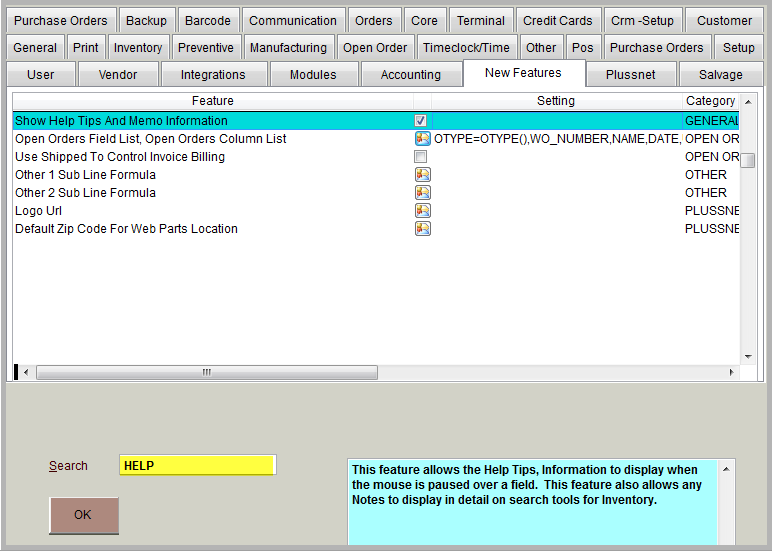
Columns can be permanently changed, moved and added as needed from the System Setup or Features area. In the Features Menu (Services, Features, select Inventory tab) or go to Utilities Menu, J. System Setup, Q. System Features, select Inventory tab; the Field List For Inventory Parts can be modified.
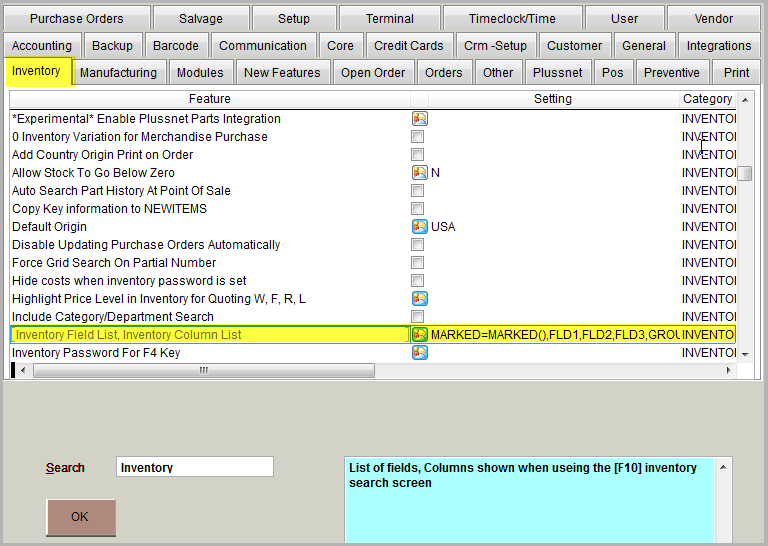
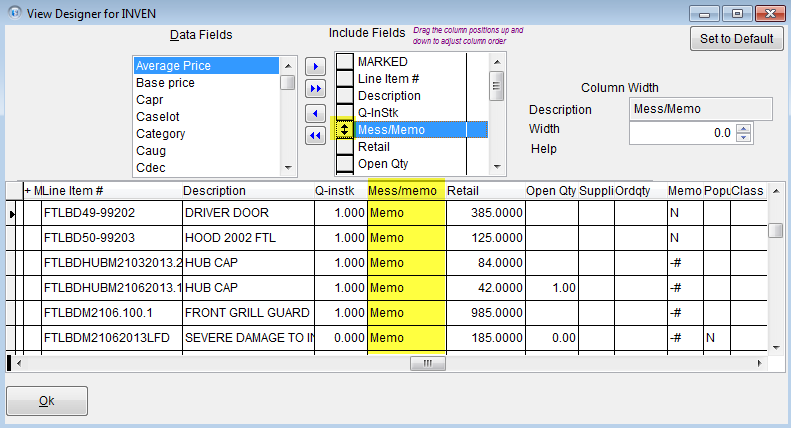
Clicking on the option titled "Inventory Field List, Inventory Column List" opens up the View Designer for INVEN as shown below,
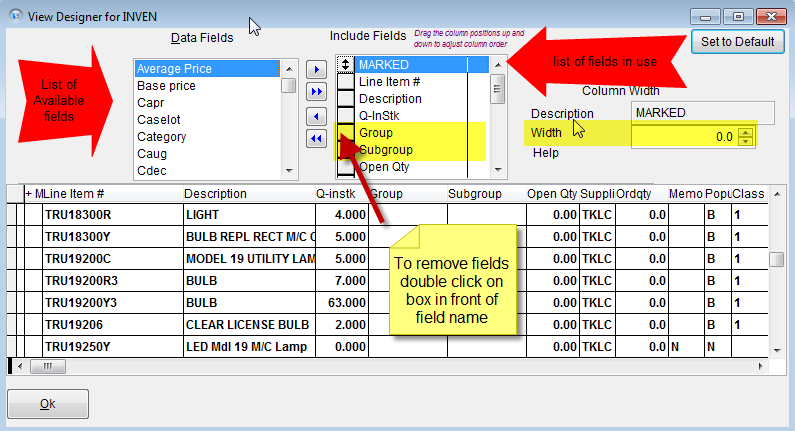
Data Fields = columns that are available for display - Double click on an item to move it to the Include Fields list...
Include Fields = columns that are currently selected to display - Double click on an item to remove it from the Include Fields list...
Width = to set the width of the selected item such as the example shown the width on the MARKED column is 0.0
Set order of Columns using the mouse and clicking in the box in front of the item on the Include fields list and drag it up or down to where you want that item shown
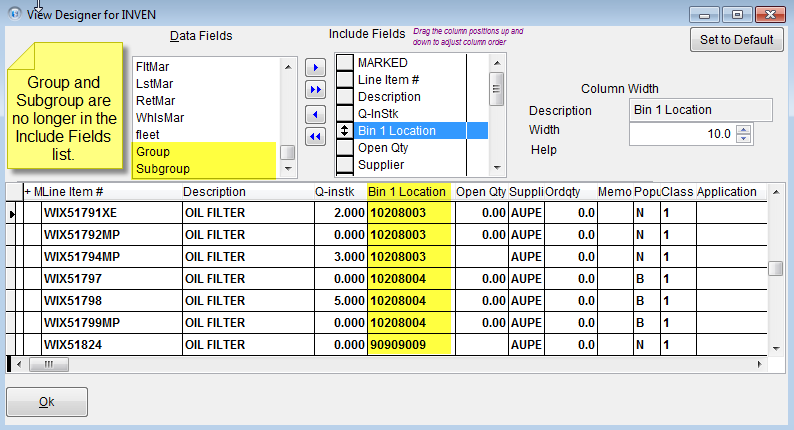
In the example we will remove Group and Subgroup, then move the Location over next to the Q-instk.
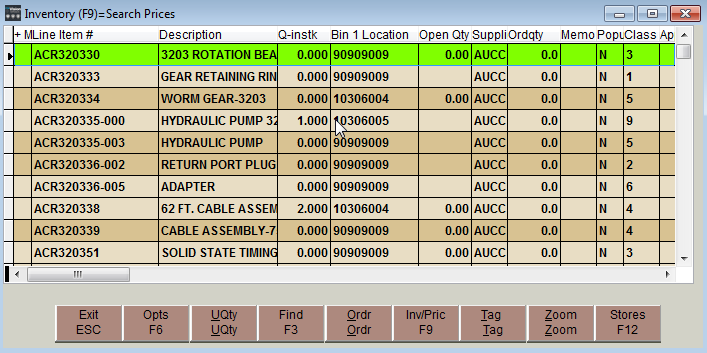
Use this feature to re-arrange the Search so that your Grid Search tools will be more readily available.
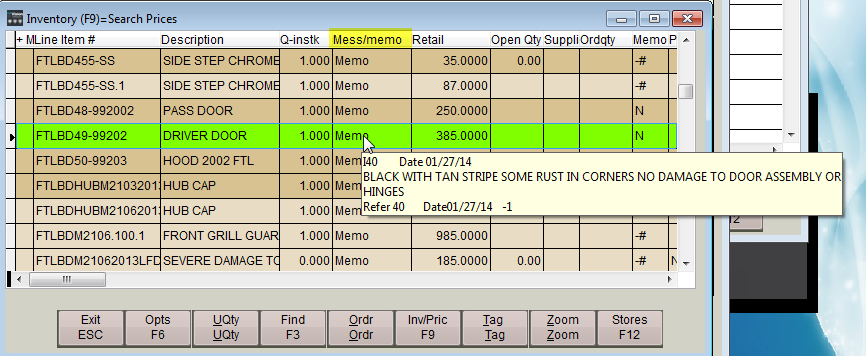
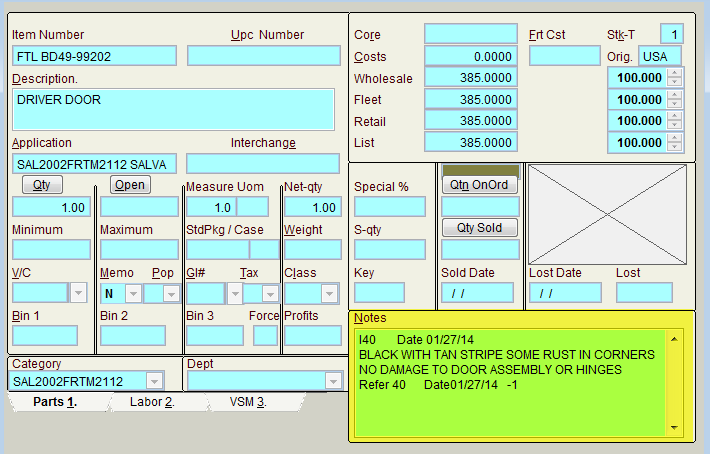
Another useful tool is to use the Note area for detailed information used for searching, selling if using the Notes area the example below shows how those notes will display if the grid view when the inventory search is setup to include "note".