
 1085
1085
On the parts & labor screen, only those items that have been setup will be displayed. It is recommended that any parts that techs have access to should be included. To apply a part to an order the tech selects the item. Each time the item number is selected it will increment the quantity up by one. Options available at this screen are described below.
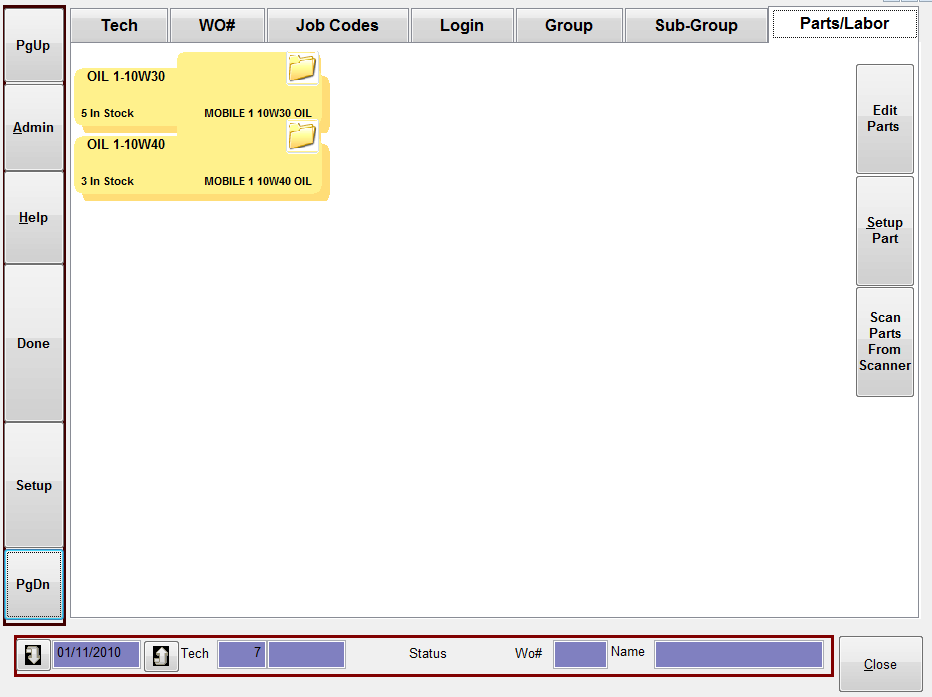
Edit Parts: Is used to Edit Parts as needed
Setup Part: To setup and add parts to the selected Sub-Group
Scan parts to WO#: Use this option if you are using bar coding to scan parts and labor into the order.
The options on the left side of screen are also used in this area
PgUp: Use the Page Up when scrolling through multiple pages of items to go to the previous page; most Sub-Groups will be setup with just a page of items to keep entry of items simple for Techs but in some cases multiple pages of items will be included under a Sub-Group so use the PgUp button if needed.
PgDn: Use the Page Down when scrolling through multiple pages of items to go to the next page…
Done: The Done button returns the screen to the Tech Screen and is used once the Tech has placed the necessary items on the Order.
Note if items from another Group or Sub-Group need to be applied simply select the appropriate tab at the top of the screen [Group] or Sub-Group] to return back and make the next choices.
Setting up Groups and Sub-Groups with Parts or Labor
Make sure the option Ability to Add Parts / Labor in the Setup screen is turned on to use these features. To setup items in the Groups and Sub-Groups choose a Tech name & then a Workorder off the list (this is just to allow access to these screens). Select the Group screen, press the button for New Group. It is best to have a plan of how many Groups will be setup to keep your list as logical and easy to use as possible.

The new group Items will come in with numbers of 1000 and sequence 1001, 1002 each time the New Group option is selected. When first starting out press the New Group button for each Group to be added then proceed to edit those items in a sequence that is easy to us. Change the number and name, once satisfied with the list of Groups select the Edit Group button to turn off the Editing functions.
Once the Groups are setup the Sub-Groups need to be added, select a Group and the screen will automatically go to the Sub-Group screen.

Click on the Add New Sub Group button to add each new Sub-Group, it is best to have a plan of how many Sub-Groups will be setup under the selected Group. The new Sub-Group items will come in with numbers of 1000 and sequence 1001, 1002 each time the New Group option is selected. Keep in mind when creating Sub-Groups that the goal is to have a simple list of items for the tech to choose from on the Parts/Labor screen to follow and its best to keep that list down to one page.
Once the Sub-Group list is setup select a Sub-Group to add the actual parts / Labor to that Sub-Group option.
Use the Setup Part button to add parts to the Sub-Group list.
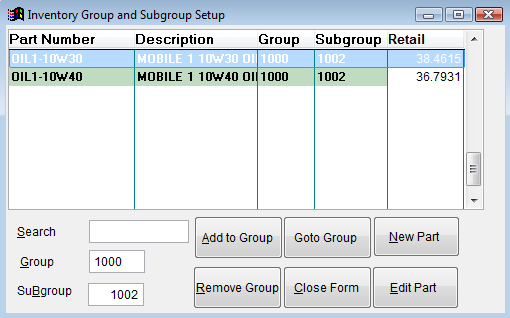
Use the Search box in the Inventory Group and Subgroup Setup screen to type in the part/labor number and search the Inventory File, one the item is found use the Add to Group button to add that item, notice that the Group and Sub-Group numbers are displayed on the screen to verify. This is why a plan should be in place when setting up your Groups and Sub-Groups, if items are setup on a Sub-Group and that Sub-Group or Group number is changed the parts will still be attached to the original numbers and will not be connected with the new number(s). use the options in the Inventory Group and Subgroup Setup screen to edit, add and remove items from the list. Use the Close Form button to close out and save the items in the Sub-Group.
Select the Group and Sub-Group tabs to return to the lists and add new items to the appropriate Sub-Groups. If an item is accidentally selected off the Parts/Labor list simply press Enter on Zero quantity to keep it from applying to the Workorder. Select Done when completed.
Using Group/Sub-Group to add parts or labor to an Order
The option Ability to Add Parts / Labor in the Setup screen must be turned on to allow Techs to use these features. The Tech must first select their name/number off the Tech list, then select the appropriate Workorder or Job as required.
Notice that the Status Box at the bottom of the screen displays the selected Order and Tech, always make sure this information is correct before continuing to add parts or log in on labor.
![]()
Next select the Group tab at the top of the menu, select the appropriate Group off the screen (Use PgDn and PgUp to locate the appropriate Group if there are multiple pages of Groups). Next once the Group is selected the Sub-Group list will appear, select the appropriate Sub-Group. If the incorrect Sub-Group is selected simply click on the Sub-Group tab at the top of the menu to go back to the Sub-Group screen. Next select the part/labor to add to the Order.
When a part is selected the Sub-Group list a Calculator Pad will appear to select the appropriate quantity to apply.
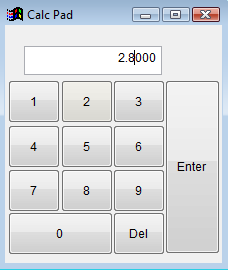
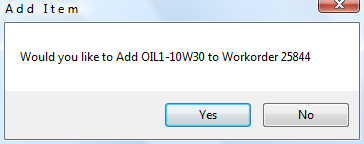
Select the Quantity using the Calculator and Select or Press [Enter], the prompt to verify the Add Item will appear, select Yes or No.
Once a part has been applied to an order from the Timeclock it will appear in red on the screen to notify the Tech that the item has already been added. Any editing or changing of pricing/quantity on the parts added from Timeclock has to be done from the Orders area of Vision and is not done in Timeclock.
Select Done to return to the Tech screen or choose Job Codes to login to a job on that same Workorder. Remember to refer to the Status bar at the bottom of the screen to verify the correct Workorder has been selected.

