1814
1814
Checklists also referred to as an Input Form can be setup as an Labor checklist
refer to Checklist or Template Labor Setup for more details.
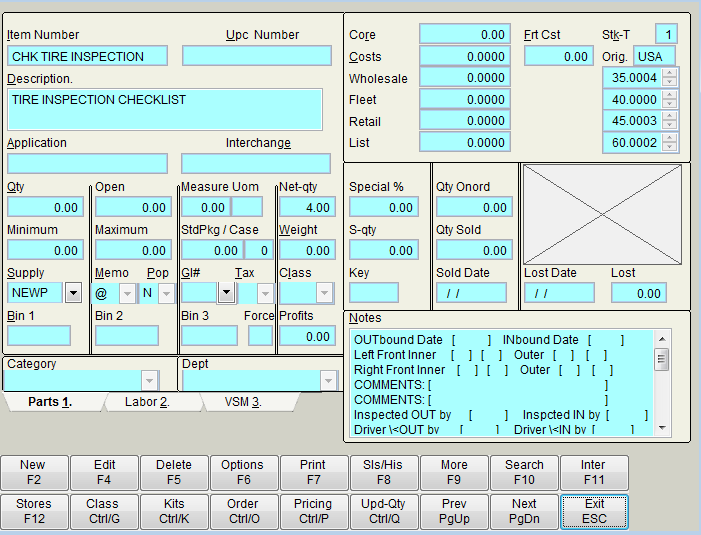
Checklists setup using the Input Form as an Inventory (Parts) item will show on the parts side, Checklists setup as Labor items will show on the Labor side and prompt at the Timeclock for complete information. The Checklist or Input Form is activated by the @ memo, the actual form is stored in the Notes section.
Setup a Parts item or a Labor job with an Item Number, description and Memo of @ then use the hotkey of [Ctrl] and [T] on the item to access the Template Editor. Setup the Checklist in the Template Editor as shown.
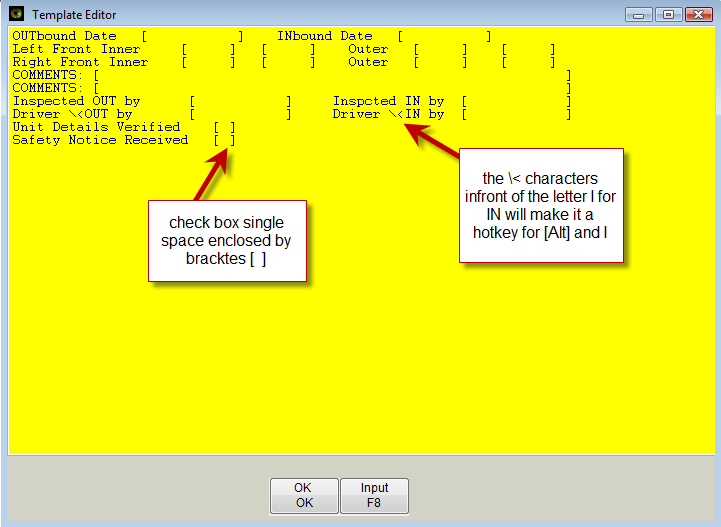
Template Special Characters
[ ] Brackets The Brackets set the width of the box for information
[ ] single Brackets with a single space becomes a check box
[X] checked Brackets with an X only becomes a check box that is defaulted as checked
\< Hotkeys The \ and < symbols in front of any letter will note it as a hot key
*hotkeys allow fields to be accessed with [Alt] and the letter indicated on input to speed up input – in the Example shown the WARRANTY Info is set with W as the hotkey letter.
Template Configuration
There can be up to ten bracketed lines / columns across the Template lines horizontally. The Template Editor will accommodate up to one hundred lines vertically. Do not put any blank lines between the lines vertically.
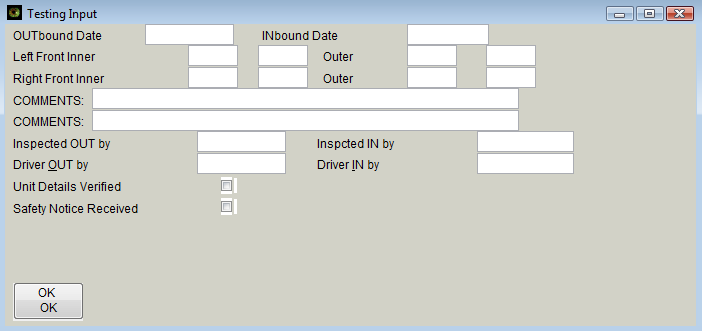
[F8] will bring up the Input Form to show how it will appear at the Point of Sale for entering data.
The information setup for prompting on the Checklist will appear in the Notes field on the item in the Inventory Detail view. The information should only be edited using the Template Editor [Ctrl] and [T].