1146
1146
The Velocity Margin and Popularity Manager allows the user to modify and change margins for any line code, class code, or combination thereof based on any price level in inventory. This tool also enables the pricing/margins/percentages to be set by the specific cost ranges. This area can be used for advanced pricing; this document is intended to familiarize the user with the basic use of this area.
NOTE: do a Complete Backup before proceeding. Always have a backup before making any mass changes to the Inventory Database
In order to use the Velocity Margin Manager you should have a plan. This tool will use the three digit Line Code, the Class Code or Inventory Store letter as the first determining factor.
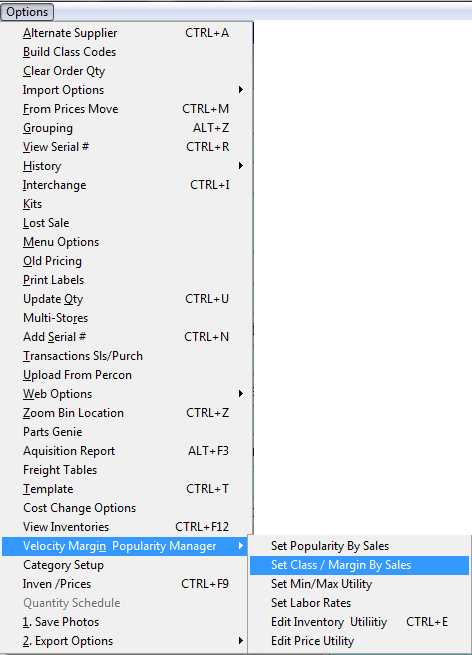
To access the Velocity Margin Manager go to the Inventory Management screen, select the [F6] Options menu; the Velocity Margin Manager is listed towards the bottom of the options menu.
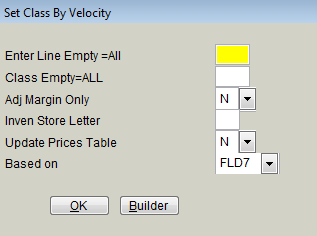
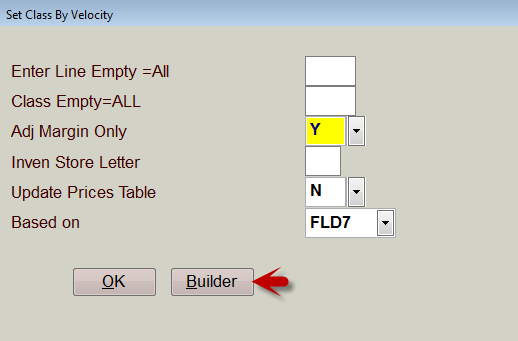
Enter Line Empty = All
Enter the three character Line Code for the parts to be changed, leave this field empty to bring up ALL items in the Inventory. The example will use FED (Federal Mogul parts) as the Line Code.
Class Empty = ALL
Class Codes are setup in [Ctrl] [C] BUILD CLASS CODES, leave this field empty to bring up ALL items in that Line regardless of set class code. The example will leave this field empty.
Adj Margin Only
Set this feature to Y if only adjusting Margins – the example will be only adjusting the Margins on the FED items so Y has been selected. If N is set the function will be used for setting Class Code ONLY.
Inven Store Letter
Refer to MULTIPLE INVENTORIES for details on Inventory Store Letters. This example is a Single Inventory setup so the store letter is left blank.
Update Prices Table
If this selection is set to Y it means the changes will only apply to the PRICES DATABASE not the Inventory Database. The default setting is N and the example uses N to make the desired changes in the Inventory Database.
Based On
The most common setting to base Margin changes on is the Cost which is FLD7. The drop down list available shows the different fields/price level options.

This example will use FLD7 which is Cost.
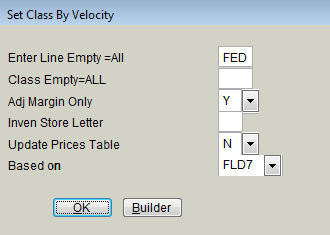
REMEMBER: this is an example and not the ONLY way to do this, you can use any line code in your system, you can also narrow the process down to only use a specific class code within each line code in order to limit the changes to just that class. Once you have finished, press “OK” to go onto the next screen.
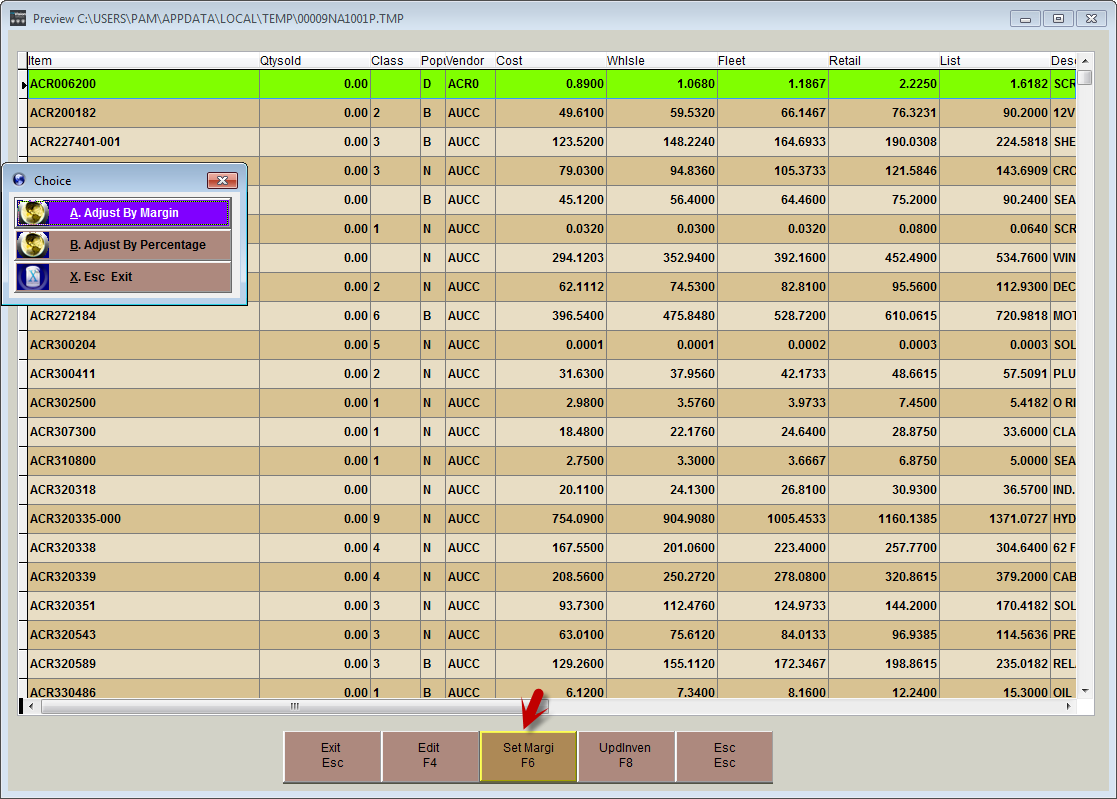
This next screen allows you to put in the margins (or percentages) that you want to use in your line code. During this tutorial we will only be using margins, if you wish to use percentages you can, however they will be converted to Margin. Vision ONLY displays Margins in inventory.
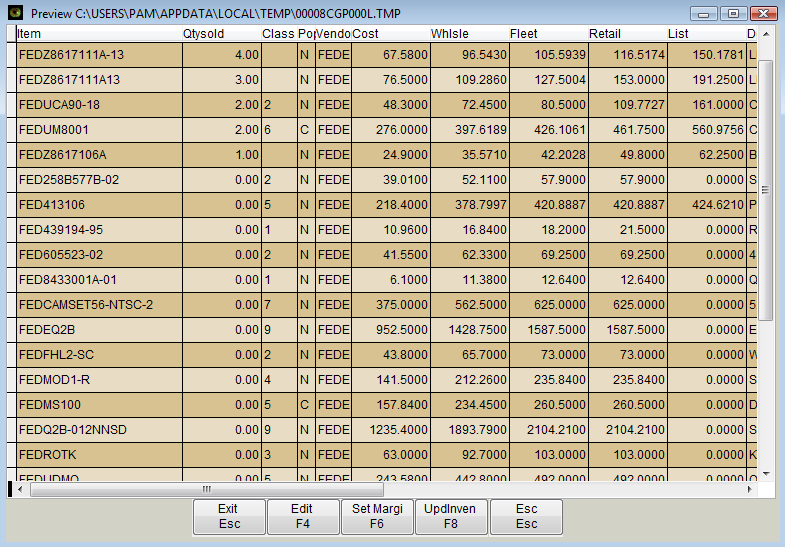
[Esc] Exit Exits this area making no changes
[F4] Edit Opens ALL of the fields show for individual editing (use with caution)
[F6] Set Margin Sets the Margins based on the previously determined FLD7 (cost)
[F8] UpdInven Applies the changes to the Inventory or Prices Database
[F6] Set Margin
Will bring up a Choice box, select A to use margin or B to use percentage. Remember Vision will convert percentage to Margin so a 20% markup will become approx a 16.47 margin.
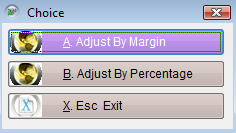
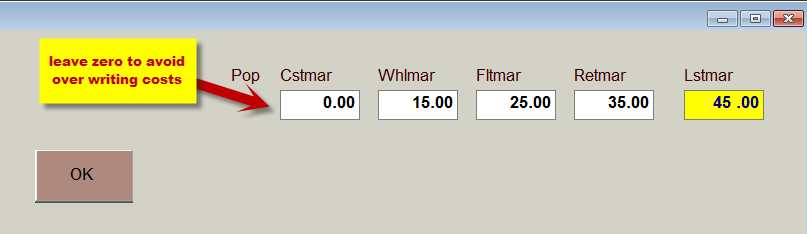
Selecting A. Adjust By Margin brings up the next screen.
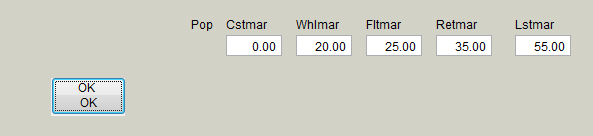
The example shows a simple change to all Pricing except the Cost. Typically the Cstmar is not changed unless dealing with a vendor’s system wide price increase. Any field left zero will not change.
NOTE: in certain cases (jobber prices) the margins will need to be negative, such as when setting Cost based on -40% of LIST; the cost would be -40 while the List would be left at Zero.
Once the changes are set select OK to view the proposed change.

Notice the Wholesale, Fleet, Retail and List have changed. Below is a picture comparing an item on the list before and after.
![]()
![]()
The new margins actually dropped the selling prices. The screen shows these proposed changes.
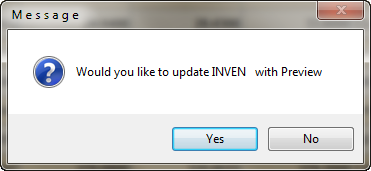
If satisfied with the proposed changes select the option [F8] UpdInven. The [F8] option will update the Inventory Database with the changed selling prices – back in the beginning if the Update Prices Table had been set to Yes these changes would only apply to the Prices Database.
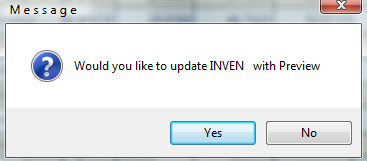
Selecting Yes at this point will update the Inventory Database (INVEN) with the proposed changes. The screens will all close and you will be back at the main menu of Vision. Go into Inventory, pull up one of the part numbers you are looking for to view the new selling prices and margins or use [F9] to view it in the Prices Database.
This is the most common use of the Velocity Margin Manager, if you need more detailed assistance with this, please call our help desk.
NOTE: To Set Margins on ALL parts use the [Builder] option to exclude LAB - to keep margins from changing on your Labor
below is an example of the settings to use:
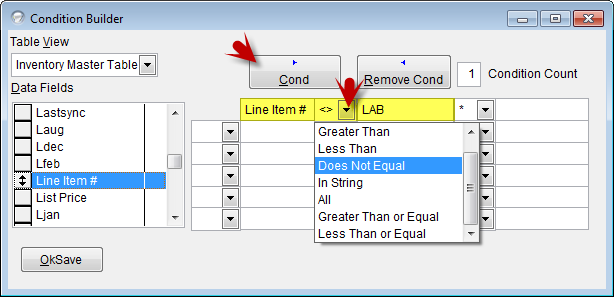
If your default margins and / or default lines were not setup properly in the beginning and you are starting over one of the items that will need to be reset are your margins. Below are basic instructions to set the margins on ALL items in inventory (excluding Labor).
Go to Inventory, pull up any item in your inventory; use the [F6] options or select Options from the drop down menu at the top of the screen.

Select [F8 Upd Inven] to update the inventory file with these changes; the system will verify you want to update INVEN with these changes, select Yes to continue.